Feeds:
Posts
Comments

Archive for the ‘How To’ Category

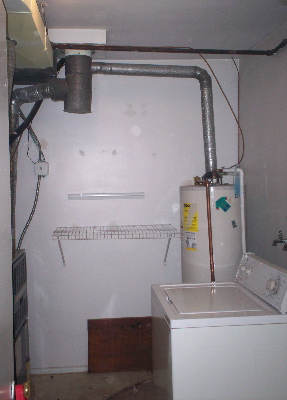
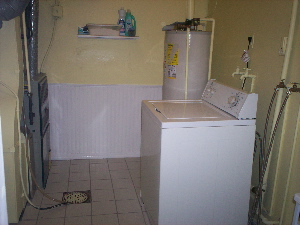
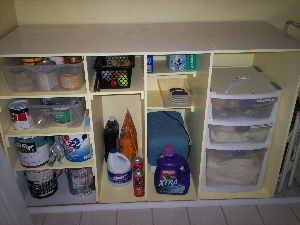
I have a very small laundry room (8′ x 10′) that also houses the hot water heater, the furnace, and what once was the electronic air cleaner (and now holds a 5″ air filter,) my washing machine and a large storage unit I (and friends) built a number of years ago. This room has also become a bit of a junk room.

Two years ago I started to work on this room. I tore out a closet (see before pic below) and began painting the room. It has been half painted for these two years.

Some friends and I built a large storage unit that is supposed to act as a folding/air drying table as well. It houses paint and other items that one normally finds in a utility room. The top never got tiled, and became another place to put junk.

To top it all off, the two layers of flooring have been coming up – some places just one layer, and in other places both layers.

So, I cleared the room and started painting. I decided to paint everything – wall, ceiling, pipes and ductwork – the same color so this small room wouldn’t look so busy. Cost for paint and painting supplies – $45.

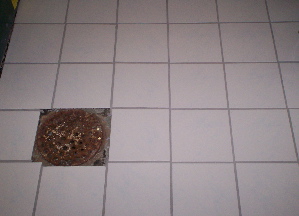
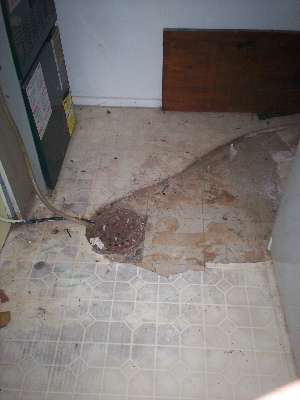
Then, I began to peel up the linoleum and scrap off the floor tiles. Thankfully, these both came up pretty easy. The black substance is the glue.

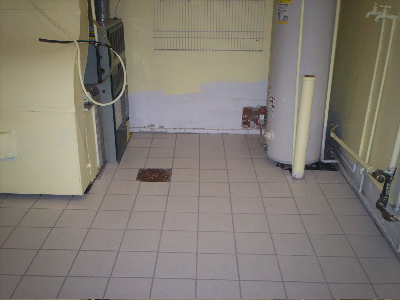
Then I tiled the floor. Check out HOW TO… Tile a Floor for this tiling project. Cost for tile $0 (They were extras given to me by a friend – she got them for 25 cents a tile which would make the cost of the tiles I needed $50. You can probably find very inexpensive tiles for a small space off of Craig’s List or a salvage yard.) Cost for tiling supplies – $47. I could have probably gotten these cheaper on Craig’s list if I had thought about it.

Ta da…

I did some additional painting of pipes and behind things I didn’t think could be seen – but I discovered that they were visible.

I found some white gloss paint leftover from a previous project. I used that to paint the baseboards.

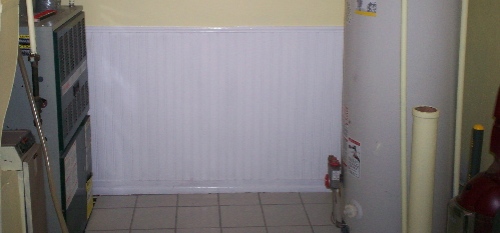
I then repaired the hole in the back wall, and placed wainscoting over the top as a decorative touch. I added molding to the top. I painting this the same color as the baseboards. The wainscoting and molding was a little over $26.

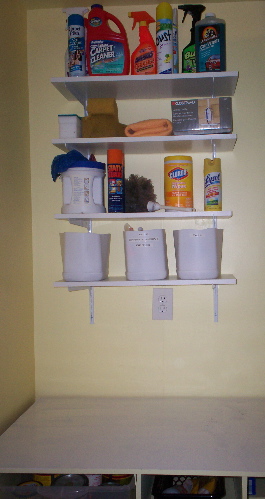
I also purchased inexpensive wall and shelf brackets. I already had shelves – given to me by a friend a few years ago. Cost of the shelf unit – $27.

Done. Total cost of the project was $145.

  • paint and painting supplies $45
  • tiling supplies $47 – and about half of that cost was for tools that can be reused.
  • wall repair $26
  • Shelf $27

I still need to tile the top of the storage unit, but I have the thin-set, grout and tools needed. I just don’t have enough floor tiles left, but I have lots of different colored single tiles and I may do a mosaic – or I may just go buy some basic white tiles to finish the project.

BEFORE

AFTER

BEFORE

AFTER

Yes, I am pleased!

Read Full Post »

HOW TO… Tile a Floor

My laundry room had linoleum over 12″ square hard floor tiles that were glued to the concrete floor. I know this because in various parts of this 8’x10′ laundry room I could see all of these three flooring surfaces. And, the linoleum was pretty badly worn where it still existed.
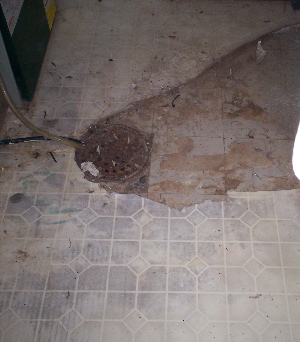
A few months ago a friend of mine gave me 10 boxes of 8×8 tiles – enough to tile this laundry room. It took me a while to get to it, but I did it!

Here’s the “How To” section – or at least the “How I Did It” section:

First off, pull up all the old flooring. I used a pry bar and that worked pretty well for the hard tiles underneath. I used a box cutter to cut manageable pieces of the linoleum so that I could pull them up and throw them away easily. The black stuff in the photo below is the old glue – but trust me, it was on there solid, so there was no taking it off.
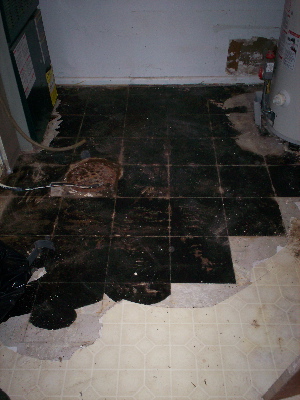
Generally one would pull up the baseboards, but the baseboards in this room appear to have been liquid nailed to the wall – so I left the baseboards on (because I really had no desire to re-drywall this room.)

Then sweep and clean the floor surface well. I used a shop vac to get all the tiny pieces out of the corners – and everywhere else.

Items you will need:

  • tile
  • tile spacers (1/8″ are used for vertical surfaces, for horizontal surfaces it appears to be a personal choice. I used 1/4″)
  • notched trowel
  • thin-set mortar
  • a thick piece of wood or a heavy duty spoon or other type of tool for heavy stirring
  • 2- large buckets (one for mixing the thinset and one for mixing the grout) I used an old cat litter bucket I got for free off of Craig’s List and one I got for a few bucks at the box home improvement store.
  • tile cutter – can be rented at the box home improvement store – or borrowed from a friend as I did.
  • grout (sanded is used for spaces larger than 1/8″) – make sure you take a tile with you when you pick this out – there were roughly 25 colors from which to choose when I decided.
  • a grout float (which evidently is a type of trowel)
  • large sponge (or two)
  • bucket for cleaning out sponge in water
  • grout sealer
  • knee pads, or several thick towels – most of this work is done on your knees.
  • For those over 40 – Advil or other pain reliever (trust me, you’ll need it) and perhaps a heating pad.

I called on a friend, Ed, who had tiled a number of times in his past. In previous posts I have referred to him as the “toilet guy.” Actually, Ed is your basic Renaissance Man – someone who can do almost everything – cook, tile, plumbing work, electrical work, sew, etc. (in addition to being an incredible friend.) Anyway, when I told him I was going to tile, he asked if I would like some help. Not being an idiot, I said “yes.”

Before Ed arrived I did a dry set. Basically, I lined up the tiles in both directions with the spacers to see if we would need to do any cutting of tiles. I discovered that from left to right (in the photo) no cutting would be required (yea!), but from top to bottom, we would need to cut half tiles for the back wall (which will eventually be covered up with my laundry sorter) giving me a full tile just inside the door.
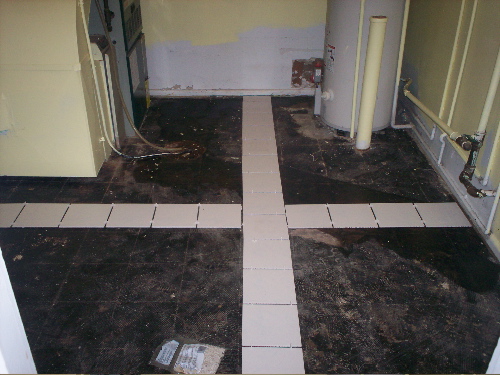
Mixing the thin-set was difficult the first time because we did exactly as the instructions suggested – put the water in then put all the mix in, then stir. Much of the powder got stuck to the bottom of the container and I had to take a yard tool with a long handle to scrape the bottom of the bucket and stir with. The next time we made thin-set I put the water in, and then a little of the thin-set and mixed and added more of the powder mix and stirred and added the rest and stirred. This worked out much better.

The rest of the directions on the bag of thin-set were very clear and helpful, and included illustrations in larger type for easy reference.

Bless Ed’s heart, he tiled when I had to leave and help my 100 year old friend who had fallen, and a good chunk of the work was done by the time I got back.

The basics for placing your tiles: Put your trowel into the thin-set and place thin-set on floor. Spread thinset over the entire area for each tile, then using the notched section of the trowel, scrape over the thin-set leaving some areas higher than the other, then place the tile. Insert the spacers and push into place. The tiles can be easily moved for quite some time if slight adjustments need to be made.

The dark area in the middle of the floor is the drain (which needs to be cleaned well and painted.) And, yes, I can see from this photo that I have some touch up painting still to do.
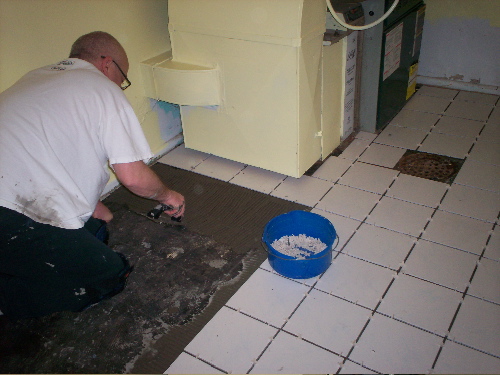
Cutting the tile was not as easy as one would think. BUY MORE TILE THAN YOU THINK YOU NEED! If there is any cutting to be done you will probably have tiles that don’t cut as you would like and that you can’t use. Remember when measuring for placing tiles that you need to reduce the cut by the grout on both sides.

As we were nearing the end of placing the tiles, we almost ran out of the thin-set. I grabbed a rubber spatula and scrapped the side of the bucket. That worked very well. It cleaned up with no problem when we were done.

Now is the time you will want to take the Advil and grab the heating pad. There is a reason that nothing can be done on the floor for the next 24-48 hours… the person doing the tiling is recouping. I spent the next 24 hours with a icy hot patch on my back, Ed went to the gym and walked or ran several miles on the treadmill. By the following day we were both in much better shape (obviously he was in the better shape.)
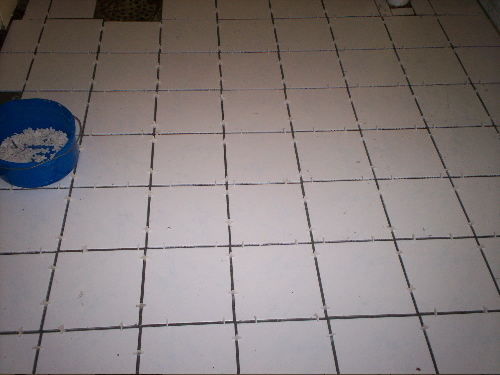
After 24+ hours, remove the spacers. First I started to individually remove these – but after about 10 I thought “there has got to be an easier way.” And there was! I took a broom and started sweeping the spacers into a pile. Not all of them moved, but at the end I only needed to remove another 20 by hand, the rest of the 600-700 spacers swept up easily. I put them in a plastic bag to reuse for my next tiling project.

After I removed the spacers, I went in and wiped off the dried thin-set on the tiles with a sponge. It doesn’t matter how careful you are, the tiles will probably get dirty as they are placed. No worry, the thin-set wiped off very easily.

The next part of the project is the grouting.

Mix the grout in a bucket as specified on the bag… except, add the powdered grout a little at a time to the water so it all gets mixed well and with less effort.

Take the float, load it with grout and push into the spaced area at a 45 degree angle. The directions on the bag of grout were very easy to understand and included step by step illustrations. Follow these. They include wiping off the excess grout gently after about 20 minutes, then waiting 2 hours and wiping off the film on the tiles (I did this twice.)

Take more pain reliever.

Wait a day or two.

Apply sealer to the grout – twice.

Take more pain reliever.

Move all the items from your laundry room out of the room or rooms in which you have been storing them (for me that means my washing machine is no longer in the middle of my kitchen, and the various storage tubs of items I took out of the folding table/storage unit are no longer under my kitchen table, and the 3x6x4 folding table/storage unit that I built several years ago is out of the hall leading to my sun room.)
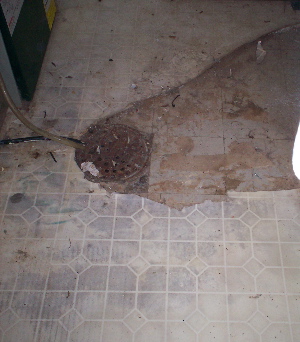
Before

After

Read Full Post »
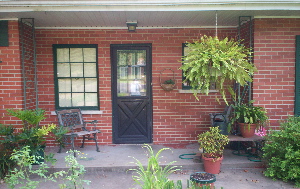
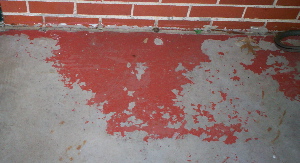
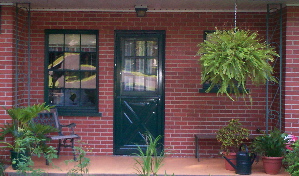
My front stoop was nothing exciting. A place just outside my kitchen door that held a chair a bench and a bunch of junk. It wasn’t terrible – but the stoop did have two different colors of paint – mostly peeling – blotching up the bare concrete. And… the door was black. Nothing on my house is black but this door and the door into the foyer (but that’s another story – and another project.)

porch1

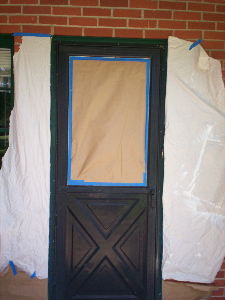
First thing I did was to purchase spray paint suitable for metal. Cost of under $5. I covered the window and the surrounding brick and started painting.

door1

I used paper for the window that had drawings and a diagram on the back from when a friend and I made a riser to go around a baptismal font with an octagonal base. On the sides I used a cut up shower curtain – purchased at the dollar store and used twice before as a drop cloth for painting projects.

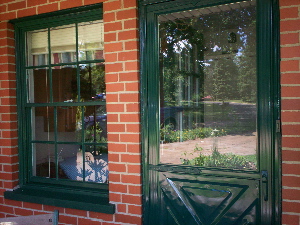
While the door was drying, I went about working on the windows on either side of the door. Thankfully I had this paint on hand, so I didn’t have any additional cost here- just a little bit of effort to touch up. I also used some green caulking I had on hand to caulk around the door and windows.

window2

Next I went about working on the floor. As I said, it had several blotches of paint on it.

blotching

I took a metal scrub brush that had a scraper on it and got the majority of the paint off.

Then I began to paint. Yes, I know I am supposed to etch and prime first – but I know that if I had to do all of that I just wouldn’t do it at all. Besides, I didn’t want to have to go out and buy anything for this project. I used what was left (about a quarter of a gallon) of concrete paint left from a project I did 10 years ago. I know it would go, because I asked my “color guru friends” what color to use with brick and hunter green (which is what was once in my sun room) – and this is the color that was selected.

I still need to put out a few accent pieces (I think I will use purple) in a chair cushion, a large flower pot for the plant on the bottom left (that is very root bound), a rug with purple in it (or I’ll paint a rug with a purple design), and I’ll make an art piece or two to hand on the wall. But, with all that still not done, I’m pleased with what I have at the moment.

porchdone

Since I had most of the materials used, my cost was just under $5 for the spray paint.

Read Full Post »
Back when I was a small child (and I am closing in on 45 fast) I would often receive a bag of goodies that included new (to me) clothes and toys. Back then, hand-me-downs were a common thing.

Hand-me-downs are still common for me.

Eleven years ago when I purchased my first (and current) home, I invited all the homeowners I knew that gardened over for a plant swap. Folks were asked to bring plants that they wanted to get rid of and take whatever they wanted. It wasn’t a tit for tat kind of thing. People just laid out what they had and picked up what they wanted. I didn’t have much to share from my new yard, but ended up with LOTS of plants – mostly stuff everyone else already had lots of. People were thrilled with their hauls and with being given the opportunity to get rid of what they didn’t want without throwing them away.

Since then, I have sort of become a clearing house for people’s plants, clothes and misc. things. I tell people I will take anything you want to get rid of and find it a home. I have been given lovely mahogany furniture that I passed along to friends whose decor works well with the mahogany; solid wood tables from one house to a church; TVs and VCRs from one friend to another.  Electronics, furniture and clothes all come to me, and in turn, I find all of this stuff a nice home… often it is my home. I haven’t purchased new clothes (except, perhaps a few undergarments) in maybe four years. I also find out what people are looking for and spread the word. You never know who has an extra dresser or bookshelf or whatever hidden in their basement or deep in a closet they would love to get rid of.

So, how to start something like this with your friends, neighbors and family?

Start talking to folks. In recent years it was in bad taste to talk about making ends meet or recycling. These days these terms are part of many conversations. Remember, it is not necessary to be down to your last nickel to organize one of these things. This is a great way to not only save money, but save the planet as well. If you don’t need to do it for financial reasons, do it for environmental ones.

Do you have friends that have kids older than yours that you would love to get a hold of some of their clothes? Do you have clothes that your child has outgrown and need to get rid of? Play clothes don’t have to be stain-free, they just need to fit. Do you need to paint a small room and don’t have the funds for the paint? Ask around to see if anyone has leftover paint. Need furniture? Ask around. Do you have a friend who used to be your size but who recently lost (or gained) a bunch of weight? What is she/he doing with their old clothes? Start swapping with others, soon people will want to join your group and get in on the free-stuff and get rid of their things.

Plan a swap. Invite folks you know to bring clothes in their house (theirs, their spouse’s/partner’s, their children’s) and lay them out for others to take and invite them to search through what others have brought. Whatever is left can be taken to a charity or saved for the next swap. Talk to each other at the swap. What do you have in the way of furniture or household stuff that you would like to get rid of? What are you looking for? Start sharing with each other.  Remember, to get free stuff you have to be willing to part with your stuff at no charge.

Can you paint or sew or fix a toilet or …? What do you need done? Can you barter among friends, family and neighbors?

Let’s all share our resources. Find out how we can help each other and ourselves.

BTW, I am looking for a six foot tall bookcase for some friends of mine. They would prefer white but can paint it. If you know of anyone in the St. Louis, MO area looking to get rid of a (free) 6′ tall bookcase – please let me know.

Read Full Post »
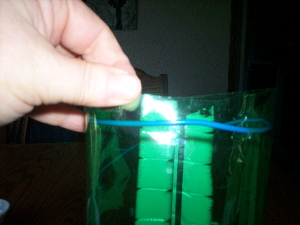
Before I created this “thing,” my clothes pins were in a small plastic container that I would grab and stick into my laundry basket. Often the pins would fall out of the container and through my laundry basket onto the ground. When I put clothes on the line or took them off, my hands were either full of clothes pins, or I was making lots of trips back to the basket to get more pins.
Now, I have seen these made from old children’s clothes – but since I don’t sew, I needed to make something out of materials I knew how to use and had on hand. Here is what I did.
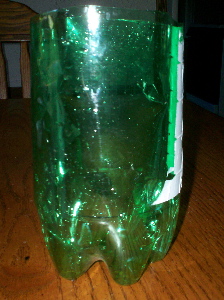
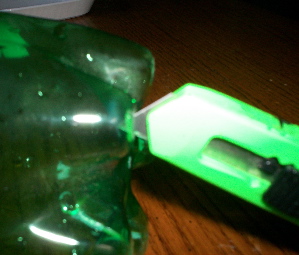
  • I took an old 2 liter soda bottle and cut the top off of it.
3
  • I then cut “X’s” into each of the points of the bottle. That way, if it gets rained in it, the water will flow right through.
2
  • Cut four “X’s” about an inch from the top of the container – cut these evenly around the bottle.
  • Once you have these “X’s,” loop a strong wire (this one was found in my garage) through these “X’s.”
5
  • Make sure you have plenty of wire, so that you can create a loop to hand over your wash line. I just twisted the excess wires around each other to keep them together.
6
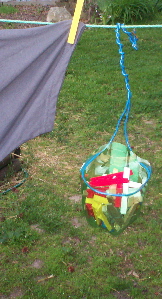
Ta Da! OK, it doesn’t look like much, it didn’t cost anything, and it was done in under 5 minutes – but it works GREAT! I can slide this along the clothesline easily so my clothespins are right where I want it when I need them. I could have covered it with white duct tape and decorated it, but the clear green plastic sort of disappears against the grass background. 1
Below are some of my previous “how to” pieces:
Of what would you like to see a “How TO?” Drop me a comment.

Read Full Post »
Sometimes when I walk into an auto repair shop I feel like I have a big bullseye painted on my shirt. Yes, I’m a woman, and it is true that I know next to nothing about automobiles. I have decided to be a better auto repair consumer.

Example #1: I went to the mechanic to have a safety inspection done (this is required to get new auto plates). I was told that my power steering belt needed to be replaced because it was cracked and tearing. And since there was the drive belt that needed to be taken off to fix the power steering belt, and it was also cracking, that this should be replaced as well. Estimate: $65.28 for parts; $52.50 labor; $2.61 shop supplies and $4.29 tax. Total = $124.68. I still had a little time before I needed the passed inspection, so I said I didn’t want them to do it just now.

This is what I did:

  1. I went to the local auto supply place. To purchase the parts was $37 (versus the $65). Most places will install parts you bring in to them – they just don’t warranty them – which is fine… most parts come with a warranty when you purchase them.
  2. I googled until I found the manual for my car. Most people have these – it comes with the car generally. I bought my used and the manual was not with it when I purchased the car.
  3. In the manual I found the area that needed to be fixed (the two – and only two – belts in the engine).
  4. I looked under the hood. The mechanic said my belts were cracked and tearing. When I looked at both the belts, they looked just fine… almost like new. I did discover, however, that if they DID need to be repaired – it was worth it to pay someone to get to them and replace them.
  5. I took it to another shop to be inspected – and you guessed it – it passed just fine.

I did have to pay the second shop $12 for the inspection – but ended up saving myself $112.78.

Example #2: I went to the mechanic to have my oil changed. The mechanic told me I really needed to change the spark plugs, and that doing so would save me money on auto fuel. I was given the estimate of $126 for parts and labor. I declined. Instead:

  1. I found the cost of the same type of spark plugs the mechanic said he would use. $10 a piece – I need four.
  2. I found out where the spark plugs were housed – right up front. Very easy access. With the right tool, it is probably a 10-15 minute job. I verified that with a friend who knows a lot about cars – very easy to do.
  3. I saw that they would require a special tool to remove the old plugs (I can borrow from a neighbor – but probably would have cost $8 or $10).
  4. I am ready to replace them whenever I get around to it. But guess what? The last two times I have gotten my oil changed, no one else has mentioned that I need to change the spark plugs again.

When I am ready to replace these (when they actually need to be replaced) I will end up saving myself $86.

The take-away is to question and to learn. Don’t just turn over your cash to the mechanic – do a little research if you can.

Read Full Post »
First off, there is no way any one person or any one post can give you all the information you need to be prepared. And, there are many different types of emergencies – and no one size fits all. However, it is better to start than not do anything.

A number of years ago I was given a terrific gift by a friend – it is a trucker’s backpack. It has over 15 pockets, 3 carrying options (top handle, side handle or padded back straps), a separate line storage area for dirty laundry, a zippered section that expands the main compartment an extra 3″, a front bottle holder for quick access to bottled beverage, and a waterproof rubber base keeps it dry if it gets set on a wet surface. The backpack is not cheap – just under $40 – but it provides me with a great feeling of security, because, in this backpack (which is loaded at all times) I have:

Entertainment:

  • a deck of playing cards
  • book of crossword puzzles
  • several pens
  • a spiral bound notebook
  • 2 paperback books I’ve not read (garage sale finds)

Personal Care:

  • a first aide kit
  • toilet paper
  • wash cloth
  • soap
  • tooth paste
  • tooth brush (still in package)
  • hand sanitizer
  • lip balm
  • hand lotion
  • wet wipes
  • lots of zip lock bags (I know it may sound gross, but I remember that folks who ended up in the dome during Hurricane Katrina couldn’t use the bathrooms because they were all backed up. If I need to “go”, I’d rather be able to seal off the smell and…)

Clothing:

  • several changes of underwear (I can’t stand to feel wet)
  • a comfortable sports bra
  • several changes of socks
  • old hiking boots with solid surface (because chances are good I will be wearing sandals – I’m always wearing sandals).
  • pair of elastic waisted shorts (because I never know what my weight might be)
  • two tees
  • pair of old sweat pants
  • lightweight jacket
  • 3 bandannas – for covering hair, wetting for the back of the neck, a separate on for blowing of the nose (don’t want to waste tp on that!)
  • old baseball hat

Food:

  • jar of peanut butter (change every 2 years due to expiration)
  • 4 pouches of tuna (lighter than cans and no can opener needed) – change every 2 years due to expiration.

Papers:

  • copy of drivers license
  • copy of credit cards
  • copy of passport
  • list of phone numbers
  • copy of social security card

Other:

  • extra house key
  • extra car key
  • mini flash light (that doubles as an emergency red strobe light)
  • laniear for whatever I want to keep handy.
  • whistle – in case you get lost – so people can find you by the sound.
  • hunting knife (inexpensive I got from a garage sale).
  • several forks, knives and spoons and a cloth napkin.
  • box of kitchen matches.

A List that tells me what I still need to grab:

  • cat food
  • dog food
  • dog treats
  • collapsible dog bowls
  • collapsible cat bowls
  • water (I have 2 liter bottles and smaller “personal” bottles of water that I change out every 3 months – that way the water will be fresh). I can fit 3 of the 2 liter bottles and 4 of the smaller into my backpack easily.
  • crackers, bread, granola, and any food that will travel well.
  • grab tent (it is always in my car – but I don’t want to forget it if it is needed)
  • grab sleeping bag (it is always in my car – but I don’t want to forget it if it is needed)
  • cat – with personal information attached to the carrier – like my name and phone number and the cat’s name. The bottom of the carrier lined with layers of newspapers (a litter box would be too much!) My cat carrier is large for the cat, so an inch or two of papers on the bottom is not an issue.
  • dog – mine has a collar with information as well as a chip in her shoulder.
  • dog leash
  • laptop computer
  • computer back-up disks
  • purse
  • cellphone
  • cell phone chargers (wall and auto)

If the plan is for evacuation

  • fill gas tank & grab gas can from garage
  • Stop at ATM for cash

So, with about 15 minutes warning I can evacuate my house and know what I have with me. Since I always keep winter clothes (hats, gloves & coat) in my car (call it growing up prepared in Minnesota) – I should be prepared for just about any problem.

I keep it in with me and my furry children during a tornado warning in the interior closet – because if my house is in shambles, I’d like to be prepared.

You don’t need a fancy backpack to put all of this – regular backpacks can be used as well, or large “carry all” bags. Just having everything in one place and a list of things to be gathered at the last minute can help prepare for lots of emergencies.

Read Full Post »
As I mentioned in my previous post, I have 20 people coming over for a party this Saturday, and if it isn’t raining, I hope that many will enjoy the outdoors. It will make it much easier for the 100-year-old birthday honoree to hear with fewer people talking nearby.

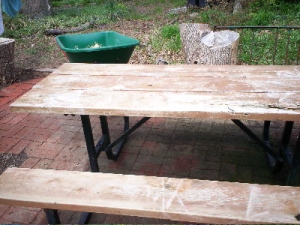
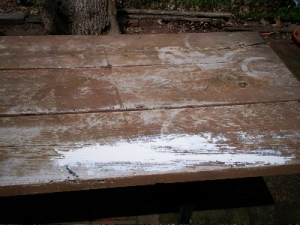
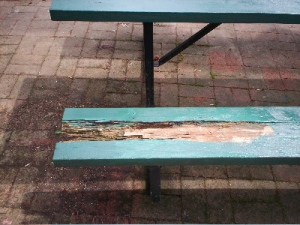
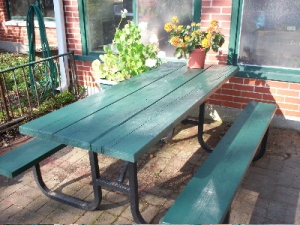
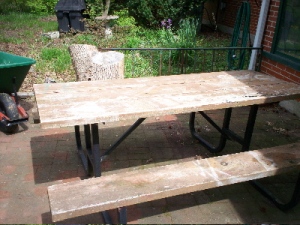
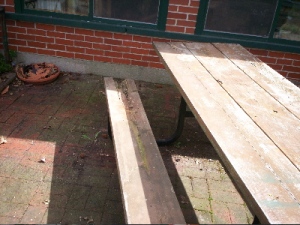
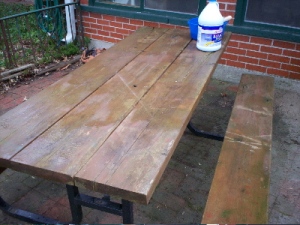
So, as I’m trying to find an easier way to pick up gum balls (I try vacuuming them up with the mower – but that doesn’t work very well), I realize that my old picnic table is in pretty bad shape (notice how easily I can be distracted from gum ball pick-up). I use it for working on my art during the summer, so it is covered in various shades of paint; it is pretty green with moss; and there is a great deal of damage to parts of the wood.

table3

table1

I decide to see if I can clean (and patch) it up enough for folks to use without having to purchase anything new.

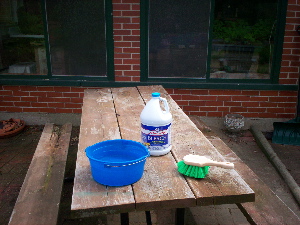
Step 1: Clean the table as best you can. I used a scrub brush, water and a little bleach. This is messy, so if you attempt this, wear something you don’t care about. I now have little bleach splatters all over one of my favorite pair of sweat pants.

table2

Step 2: Rinse with clean water (I used a hose with an attachment that let me get a hard stream of water). table4

Step 3: Let it dry in the sun. Once it is dry it looks so much better.table-9

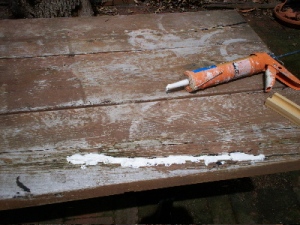
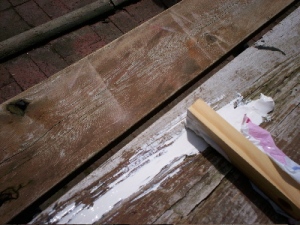
Step 4: Patch the wood. Since I don’t have a gallon of wood putty laying around, I decided to use construction adhesive. I generally have this around because I use it in my cultural artifact art.table-5

I used an scrap piece of wood to give me a flat surface to spread out the adhesive into a nice even area. This needs time to dry.table-6

table-8

Step 5: Now to paint. I had some green semi-gloss paint left over from painting the trim last year.

Step 6: For the part of the picnic table that was so badly damaged…

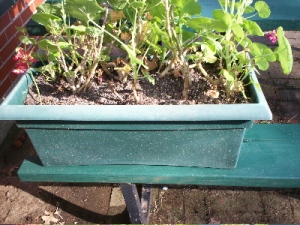
table111I painted the damaged part as best I could, then covered it with a planter.

table12

BEFORE:

table2

AFTER:

table21

Read Full Post »
buddysfridaygoodmorninggreen

Do you have a skill that will help folks save money or better cope with the current economy? If so, head over to Margaret’s Ramblings on Friday and sign up – giving your blog link.

Those who read my blog regularly know I don’t cook (much). Trust me, this is not a fancy dish, but it is quick, easy , tasty and incredibly cheap that I had to share it.

Back in college when money was really tight, my room mate (who happened to be from Malaysia) would often make this for us.

In a pan she would put a little oil, onions (or garlic) and when that has cooked for a moment, she then added chicken cut into tiny pieces (one thigh for the two of us) and cooked until the meat is done, then added a bag of frozen veggies like beans, peas or peas and carrots and let those cook for a few minutes, then added one can of pork and beans or baked beans. Poured over rice or bread (good for the last pieces of bread or heals – because it doesn’t have to taste fresh) it is very good. Add hot peppers if you wish.

Below, in the one I made yesterday, I omitted the meat and added some leftover corn. Makes two servings at about 80 cents per serving (without the meat). Very filling.

dish

Read Full Post »
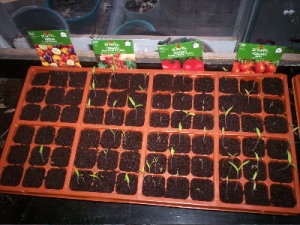
Back in January I planted 54 tomato seed: 18 Roma, 18 Big Boy and 18 cherry.

In February they had germinated nicely. The 18 on the far left are the pepper plants – they took longer to germinate.02-23-tomatoes-peppers

Now – look at them!

09

I probably should have transplanted these a while ago. But, today I had a friend come over and I was going to share my knowledge of tomato plants with him. Hands on is always the best.

To transplant tomato plants:

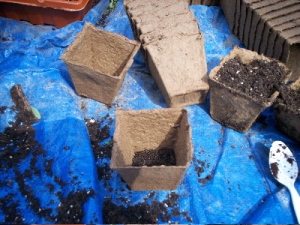
(1) Put a small amount of soil into the bottom of the new container.plant1

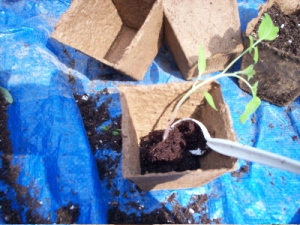
(2) Carefully dig out the seedlings. I use a plastic spoon for this type of work.

plant2

(3) Place deep into the new pot.

plant3

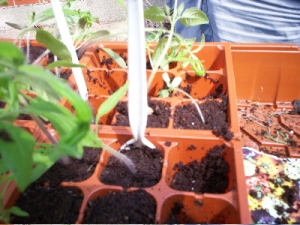
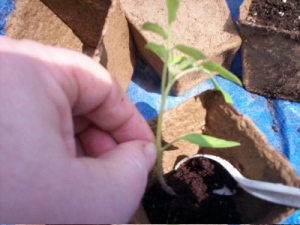
(4) Snip off the bottom set of leaves.

plant4
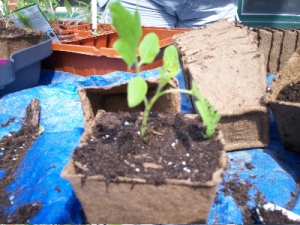
(5) Fill in with soil as far up the stalk as you can. All the “hairs” on the stalk will develop into roots.

plant5
(6) Water in.

Every time you transplant the tomato plant, plant it as deep as you can. This will increase the nutrients and water into the plant.

Read Full Post »
Older Posts »